Introduction
Sometime in 2001 I came across some posts where people had started to take some of the newer and smaller form factor PCs and installed them in their car. Thus I began my quest for ideas, software, parts, and money to build one. After about 5 years of collecting and tweaking I finally reached my goal.
Parts
A year or two ago, after a couple of tips on a few forums, I discovered that several people were selling kiosk PCs for amazing prices on eBay. I picked up a Celeron 466 with 256MB RAM, a 20GB HD all in a industrial strength box with power supply. If that isn't cool enough, it was equipped with a 12" backlit color touchscreen LCD all for just $250.

After some evaluation I came to the conclusion that this screen just wouldn't work in my car. For one, it's gigantic and would just look silly mounted anywhere. It also wasn't designed to be separated from the box and doing so would be a giant pain if not completely impossible. I decided to hit up eBay and found a newcomer to the touch screen LCD field. The TM-868 is a $150 8" USB touch screen that supports multiple inputs including VGA, has a wide viewing angle, and already runs on 12V. For a $150 it has been a great screen thus far and I highly recommend it.
To power my carputer I didn't want to use an inverter to convert my car's 12V DC to AC and then back down to DC again with a normal ATX power supply. A guy that goes by the name Mastero sells kits to build your own DC-DC power supply. I picked up his last small form factor kit and built my own power supply. It works great, takes up little space, and provides good clean voltages. If your not good at soldering, OPUS Solutions makes a sweet DC-DC power supply.

The kiosk PC had two free PCI slots so I needed to make the best of them. I didn't want to drag 100ft of Cat5 cable out my front door to my car so Wi-Fi was my first choice. A quick scan through Pricewatch and I had myself a LanReady 802.11b PCI card for $20. It has a high transmit power (100+ mW) and comes with a sweet antenna. The box didn't come with any USB slots which I needed for the LCD so that was the obvious 2nd pick. I chose a cheap USB 2.0 card from New Egg based on the VIA chipset. A couple years ago I picked up a GPS developer board from eBay . It ran me about $40 and is designed for use in moving vehicles. I decided to ditch the board and purchased a cheap (about $20) USB GPS receiver. It turned out to be a good choice and about ten times easier to install.
On a trial run of the system I found the onboard sound to be of horrible quality so I bought a refurbished Creative Sound Blaster USB MP3+ device. I've always been skeptical of a USB sound device but this has made me a believer. The sound is crisp and clear with no background noise and doesn't skip or underrun even on this older PC.
{gcmsPageBreak title="Assembly"}
Assembly
I pulled out the regular AC-DC power supply that came with the computer and drilled some holes in the case to mount my DC-DC power supply in the same place. To mount my custom electronics I went to ACE Hardware and bought a clear tube of 1/4" plexiglass to use as risers, some bolts and lock nuts. This worked out really well and I don't have to worry about it coming loose and flying around in the case during my crazy driving. I then mounted a 60mm fan to the back of the case to draw air over the power supply's heatsinks.
I installed a large eyebolt into the top of the case to loop a rope or bungee cord through it to keep it from sliding around in my car. It could also be used with a lock as a cheap security device.

I ditched the puny stock heatsink and fan combo and went with a huge copper heatsink and fan combo to make sure there was no way for the processor to overheat even during the 100+ degree F summer heat. Since I wasn't going to use the integrated sound I went ahead and disabled it with a jumper setting. Everything else met my minimum requirements so it was left as is.

Software
As you may know I'm a huge Linux advocate so it was a tough choice choosing between Linux or Windows on this project. I finally decided on Windows because it provided me with plug and play for my unique hardware. The best car PC software and GPS software only seems to be available on the Windows platform as well. I chose Media Engine for my car PC GUI and Microsoft's Streets & Trips for my GPS software. I went with Windows XP and shutoff all theming and unnecessary services in order to speed up my boot time. I also spent some time in the PC's BIOS and turned off all the devices I wasn't going to use. Unfortunately the time it takes from power to when the interface is ready is still almost a minute. I may look into Windows Tablet or Media Edition if they can help to reduce my boot time further.
Thankfully the kiosk PC also has 100mb Ethernet so copying over 12GB of music wasn't an all day affair like it would have been with 802.11b. Media Engine will optionally keep itself synced with another computer so anytime you get new music it can be copied over with a push of a button.
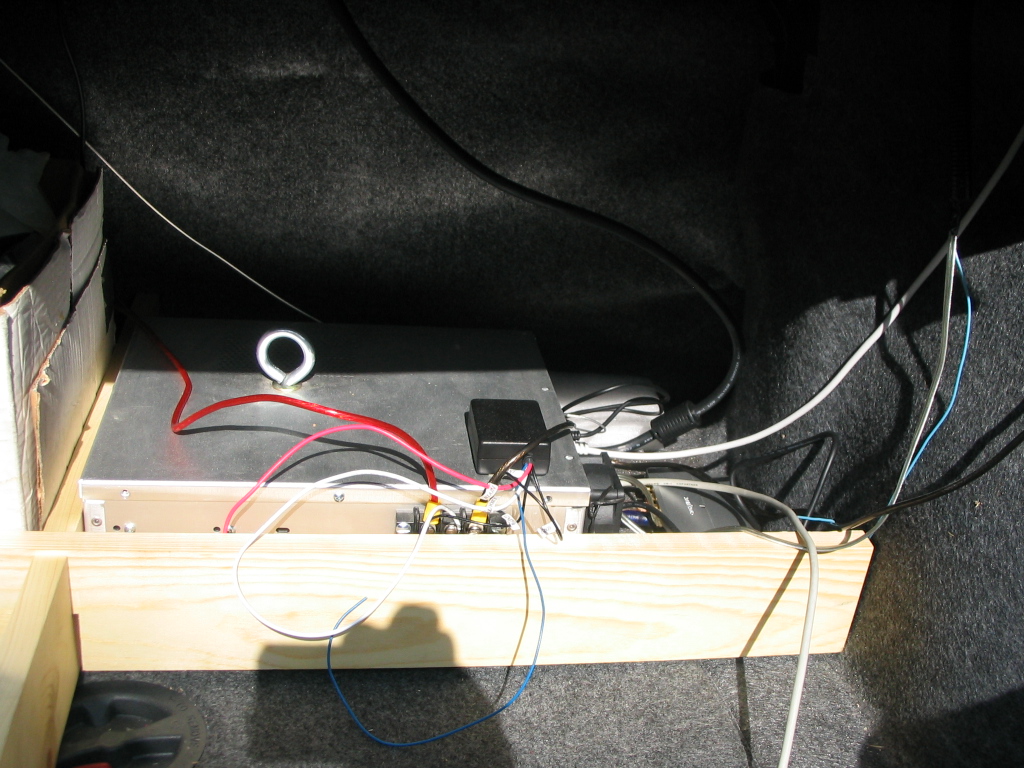
Installation
The kiosk PC was too big to stash up front, so it had to go into my trunk. To wire my car PC I bought a Scosche Professional Amplifier Wiring Kit from Wal-Mart for around $11. It comes with 20ft of 12 ga. wire that includes an ATC fuse holder, ground wire, 20 ga. speaker cable, RCA cables and remote turn-on wire. It also includes a small assortment of crimp connectors. Using this kit made installation a snap. It provides plenty of power for my carputer plus a small amp or powered sub if I ever want to add one in the future.
I went through a lot of ideas on how to turn on and off the PC. I finally decided on a remote control solution. I bought a Logisys 12V remote controller from SVC that would allow me to turn on or off the machine with a push of a button. I figured I could turn on my PC, dump new media to my car PC, and turn it off all without leaving the comfort of my desk chair. It works amazingly well but dose add an additional step to my car startup and shutdown procedure.
The GPS receiver and 802.11b antenna sit in my back window and seem to have solid connections.
The LCD I simple mounted with some Velcro over my AC controls. It was the best place to keep it out of direct sunlight and away from prying eyes. I can simple lift it out of the way to make adjustments. The audio goes into my CD deck which has an AUX jack on the front and makes changing between the radio, CD, and carputer a snap.
